http://daydreamstudios.blogspot.com/2007/12/hang-on-to-love.html
- Base material - card stock, book board, canvas, a sturdy page
- Glue that is appropriate for your text pages - Xyron, glue stick, PVA (bookbinder's glue), PPA (Perfect Paper Adhesive), or acrylic medium (gloss, matte, gel, whatever you prefer)
- Text pages you can rip up into random pieces
- Acrylic paints - one very dark, some medium tones, and at least one very light - pearl or metallic works great for the lightest tint - I like to keep them in one color and just choose different hues, no more than 5 for a postcard but you want at least 4 values of the color
- A thin rubber glove for your dominant hand at least unless you don't mind having acrylic paint under your nails and all over your skin
- Baby wipes or paper towels - I find that baby wipes are more durable for rubbing
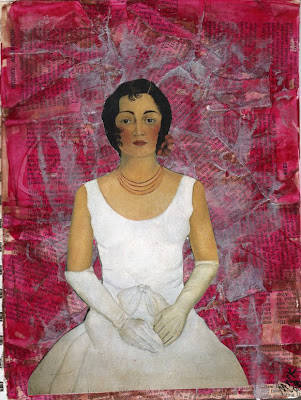
- A piece of clip art for a focal point that is no larger than 25 - 35% of the size of the background - larger might work so experiement!
- Pens that will write on dried acrylics, I like Sharpies Poster Paint pens
Part of the fun of this is to adapt the technique to use whatever you have at hand, so be creative.
A Word of Caution: Some acrylic paints contain toxic ingredients such as chromium or cadmium. You do not want to get these all over your hands where it can be absorbed through your skin. I use rubber surgical or painters gloves. You can get them at a drug store, paint store, or the big box home improvement store. I use them over and over and discard them when they spring a hole.
Instead of using canvas and gel medium, I used alternate materials more suited to a postcard. I ran a piece of lightweight bookboard through my Xyron and then put it sticky side up on my work surface. I started putting pieces of torn up text onto it, mosaic style. The Xyron makes this really easy at first until the papers start to overlap. Then just use any glue that is compatible with heavy body acrylics. You can use a glue stick if you want.
- Cover the base material with the text paper until it is covered to at least the depth of one layer. I then like to cover it with a layer of PPA or acrylic medium. It doesn't have to be completely dry before you start the next layer but it should be close to dry.
- Using your darkest paint, put a tiny drop in each corner and along the side, trying to keep the dots at least 2" apart. And by tiny drop, I mean not a lot of paint. I hold the tube of paint and touch it to the surface without squeezing. Your dot of paint should have a tiny peak maybe 1/8" high and no larger than the opening of the tube.
- Use your fingers to smear the paint sideways to cover the edge with the darkest color. You can use a paper towel here but I prefer to use a baby wipe. It doesn't have to be a new one or damp. A dried up one works fine. Cover the edges with the paint and work it a bit towards the center (not into the center), maybe half an inch or an inch at most on a postcard.
- Moving in a bit from the edge to where the darkest color is covering but starting to thin out, add dots of your next darkest tone in the same way as the first. You might want to alternate the next two tones here. Work them in with your fingers and baby wipe, letting it cover the text paper and thin out a bit towards the outside edge to blend with the darker color as well as towards the center of the piece in the same manner you did the darkest color for about half an inch.
- Using your next lightest color, do the same. Continue using lighter values of the color until you reach the center. Put a dot of the lightest value which will be your pearlized or metallic color in the middle. Make this a more generous dot but remember that you can always add more. Try to visualize where you want to put your clip art or focal point and put this color on so that it will add an aura to it, making it radiate.
- Add the clip art using acrylic medium or glue that will adhere to acrylic paint. You might want to add tiny bits of more paint and work it with the baby wipe so that it enhances the focal point. You probably have enough left on the baby wipe to do this.
- Once you are satisfied with the look, draw on the piece to enhance and add to the focal point. I like to use the faces of young girls and add dresses and bows with my poster paint pens.

